Dymo LabelPOINT 350 Betriebsanweisung
Stöbern Sie online oder laden Sie Betriebsanweisung nach Etikettendrucker Dymo LabelPOINT 350 herunter. Dymo LabelPOINT 350 User guide Benutzerhandbuch
- Seite / 14
- Inhaltsverzeichnis
- FEHLERBEHEBUNG
- LESEZEICHEN
- About Your New Labelmaker 1
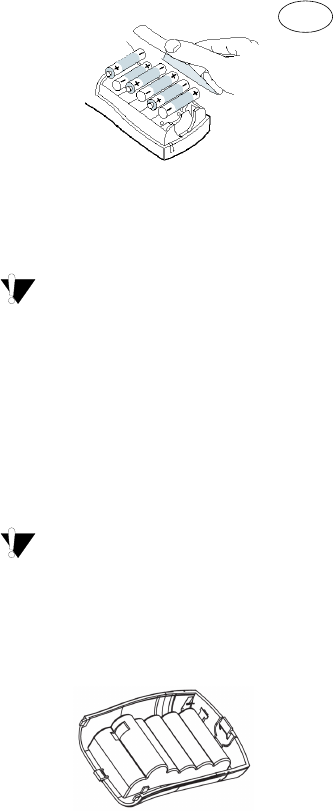
- Getting Started 1
- Inserting the Label Cassette 2
- Settings 3
- Printing Your First Label 3
- LCD Display 3
- Adding Font Styles 5
- Using Symbols and 6
- Special Characters 6
- Printing Options 7
- G to begin printing 8
- Using Labelmaker Memory 9
- Caring for Your Labelmaker 10
- Troubleshooting 11
- Documentation Feedback 12
Inhaltsverzeichnis
3About Your New LabelmakerWith your new DYMO LabelPOINT™ 350 labelmaker, you can create a wide variety of high-quality, self-adhesive labels. You can
12Storing FormatsIn addition to label text, you can store up to ten specific label formats you use frequently. This feature stores only the formatting
13TroubleshootingReview the following possible solutions if you encounter a problem while using your labelmaker.If you still need assistance, contact
14Documentation FeedbackWe are constantly working to produce the highest quality documentation for our products. We welcome your feedback. Send us you
4Connecting the Power AdapterAn optional AC power adapter can also be used to power the labelmaker. Connecting the AC adapter to the labelmaker discon
5SettingsYou can select the language and corresponding units of measure you want the labelmaker to use.Selecting a LanguageYou can select from a numbe
6CAPS ModeThe # key toggles capitalization on and off. When CAPS mode is turned on, the CAPS mode indicator is shown on the display and all letters th
7When you select a font, that font applies to all characters on a page. If you want to use more than one font, you must insert format breaks. See Usin
8A label can be underlined or enclosed in a box or background, but not both together.To set the box style1. Press the > key.2. Select a frame style
9Figure 12 To add a symbol1. Press . The first row of symbols shown in the table appears in the display.2. Use the arrow keys to move to the desired
10Printing Multiple CopiesYou can print up to 16 copies of a label at one time. When printing multiple copies, a dotted cut-line is printed between ea
114. One or more question marks appear between the barcode symbols ( ). You may see a 0 in the far right position for some barcode types. This is a ch
Verwandte Produkte und Handbücher für Etikettendrucker Dymo LabelPOINT 350
 (12 Seiten)
 (30 Seiten)
 (43 Seiten)
 (21 Seiten)
 (17 Seiten)
© 2020, manymanuals.de. Alle Rechte vorbehalten. | 0.404 s |
 Manymanuals.com
 Manymanuals.de
 Manymanuals.fr
 Manymanuals.it
 Manymanuals.pl
 Manymanuals.cz
 Manymanuals.es
 Manymanuals-pt.com
Kommentare zu diesen Handbüchern